Who isn’t excited for the new Star Wars movie opening on December 18th? That’s my birthday, so we’ve already decided that we will make it a Star Wars celebration!
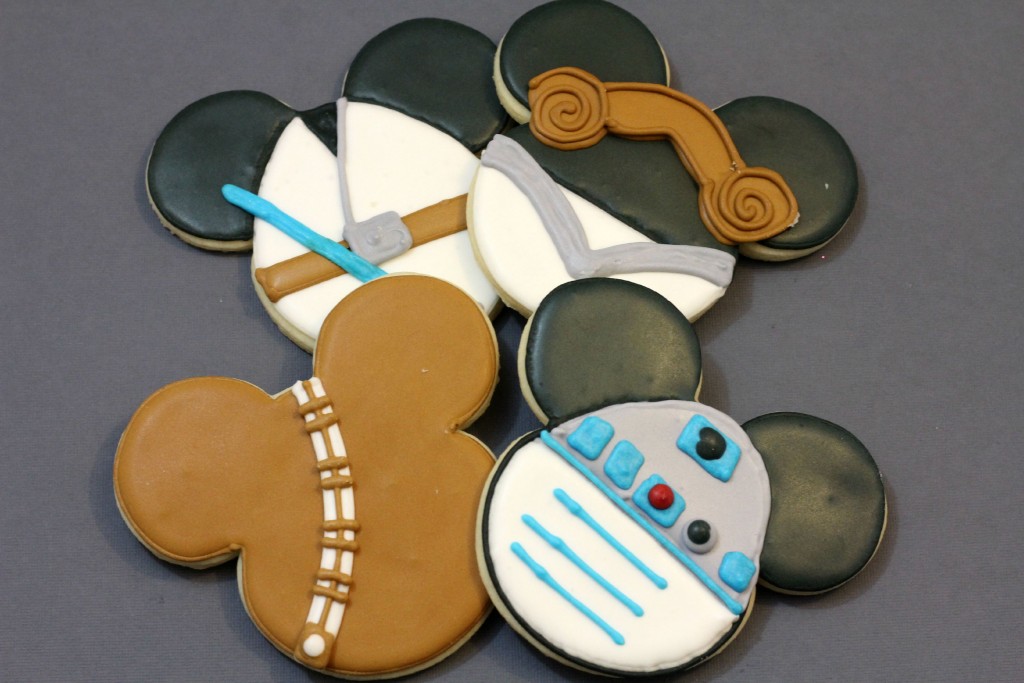
What’s a celebration without treats right? I love these super cute and tasty Star Wars Mickey cookies! They are easy to make, and the kids are going to love helping decorate!
Cookie Recipe:
Cookie Ingredients:
5 C flour
2 tsp baking powder
1 tsp salt
1 1/2 C soft unsalted butter
2 C granulated sugar
4 eggs
Royal Icing Recipe:
Anakin & Princess Liela Icing Ingredients:
2 egg whites
1 C powder sugar
1/2 tsp cream of tartar
Black, white, grey, brown & blue gel food coloring
Royal Icing Recipe:
Chewbacca & R2D2 Icing Ingredients:
2 egg whites
1 C powder sugar
1/2 tsp cream of tartar
Beown, grey, black, blue & red gel food coloring
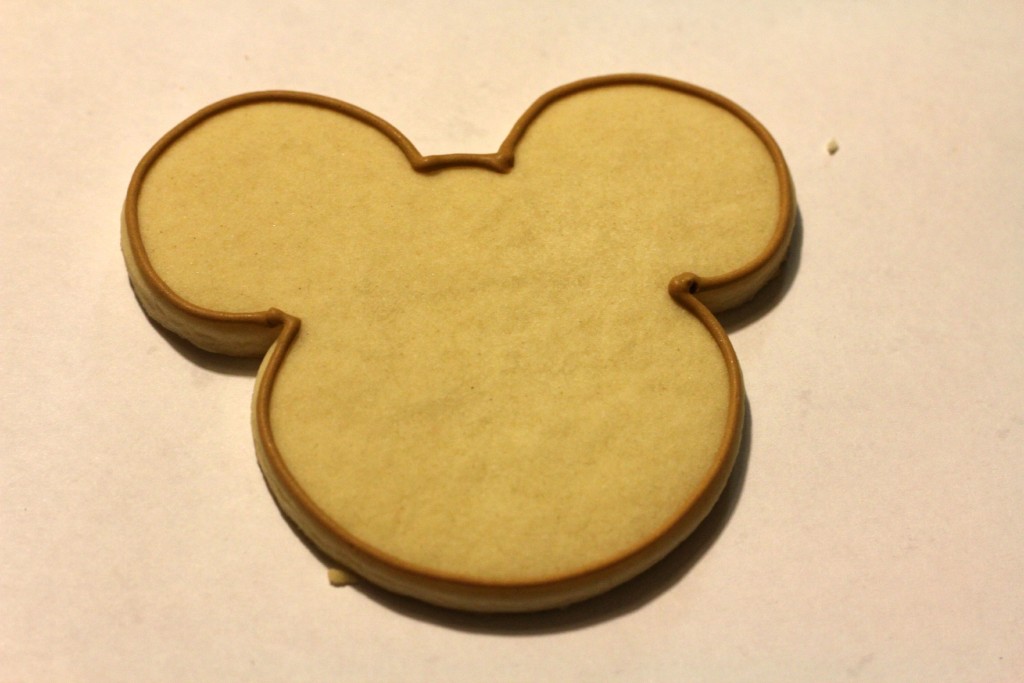
Cookie cutters:
Mickey Mouse
Cookie Directions:
– Cream the soft butter with the sugar until the combination is smooth not grainy to the touch in a mixing bowl.
-Add all 4 eggs at one time. Continue to mix.
-Add the vanilla. Continue mixing.
-Sift the four, baking powder, and salt together.
-Add the dry mixture to the wet mixture.
-Continue mixing to make sure all ingredients are thoroughly blended.
-Make the dough into a ball, wrap it in cling wrap completely covering the entire dough ball.
-Put in the refrigerator for about 6 hours or overnight. Check to see if the dough is firm.
-Preheat oven to 325 degrees.
-Pull the cookie dough out of the refrigerator and sit it out to soften up a bit.
– Put flour out on the wood cutting board, rub flour on the rolling pin, and work some flour into
the batter. (if needed)
-Roll the dough out on the cutting board and using the plaque cookie cutter begin to make your cookies.
-Line the cookie sheet with parchment paper.
-Using a metal spatula move the cut cookies to the parchment lined cookie sheet.
-Bake at 325 degrees for 8 minutes. Check to see if the cookies are thoroughly baked.
-Take the cookies off of the cookie sheet and put on a wire rack to cool completely.
(About 10 minutes).
Anakin & Princess Lela Icing Directions:
-Combine all ingredients in a mixing bowl mixing on medium speed for 4 minutes. (except your food coloring)
-If icing is not stiff enough add 1/4 C powder sugar.
-Take out 2 TBSP of icing add several drops of blue gel food coloring. Stir to mix.
– Take out 3 TBSP of icing add several drops of brown gel food coloring. Stir to mix.
– Take out 3 TBSP of icing add several drops of grey gel food coloring. Stir to mix.
-Divide the remaining icing into two bowls.
– The first bowl add several drops of black gel food coloring. Stir to blend.
-In the second bowl, keep this bowl of icing white.
-Spoon each color of icing into individual frosting bags with a #5 tips. Twist the open end of the bag to push the icing to the tip.

Icing Directions:
Anakin Mickey
-Using the Anakin in the picture as the outline.
-Outline each of the Anakin cookies in white except for the ears and the top of the V-neck. Allow to dry for about 30 seconds before filling in the cookie. Fill in where the cookie has been outlined in white with the white thinner icing.* Allow to dry for about 30 seconds.
– *Squeeze the half of the white of the icing into a bowl then add 1 tsp of water to this and mix it in.
-Leave the rest of the icing in the frosting bag for later use on the cookies.
-Referring the Anakin /Mickey’s picture as an outline, draw a brown belt in the middle of the cookie . Outline the belt in brown then fill it in. Use the thicker icing.
-Outline the buckle on the belt and the detail on the shirt in grey icing and fill the buckle in with thicker grey icing. Allow for it to dry for 30 seconds.
-Add a lite sabre in the blue, outlining and filling in with the thicker icing across the middle of Anakin’s body. Add a small square at the bottom of the lite sabre in grey, outline then fill it in with the same icing.
– Outline Mickey’s/Anakin’s ears & collar in black then after 30 seconds for drying fill in the ears and collar in the thinner black icing. – *Squeeze the half of the white of the icing into a bowl then add 1 tsp of water to this and mix it in.
Allow these cookies to dry from 5-10 hours
Princess Lela Minnie:
-Outline each of the Minnie/Princess Lela cookies (the top half) in black . Allow to dry for about 30 seconds. Fill in the top half of the cookies in with the black thinner icing.*
– *Squeeze the half of the icing into a bowl then add 1 tsp of water to this and mix it in.
-Leave the rest of the icing in the frosting bag for later use on the cookies.
-Outline the brown hair on Princess Lela, allow the 30 seconds to dry. Fill in the hair with the thinner brown icing. – *Squeeze the half of the icing into a bowl then add 1 tsp of water to this and mix it in.
-Follow the Minnie’s/ Princess Lela picture as an outline.
-Outline the bottom half of Minnie in white allow to dry to a few seconds before filling it in white thinner icing. Allow 30 seconds for this part to dry before moving on.
-Outline the top of Princess Lela’s dress in grey, (the shape of a V) allow the 30 seconds to dry. Fill in the “V” with the thinner grey icing. – *Squeeze the half of the icing into a bowl then add 1 tsp of water to this and mix it in.
-Allow these cookies to dry from 5-10 hours
Chewbacca & R2D2 Icing Directions:
-Combine all ingredients in a mixing bowl mixing on medium speed for 4 minutes. (except your food coloring)
-If icing is not stiff enough add 1/4 C powder sugar.
-Take out 1 TBSP of icing add several drops of red gel food coloring. Stir to mix.
– Take out 3 TBSP of icing, add several drops of blue gel food coloring. Stir to mix.
-Divide the rest of the icing into three parts. In the first bowl add several drops of brown gel food coloring, stir to blend.
-Divide the remaining 2/3 s icing into three equal parts.
-In the first bowl add several drops of grey gel food coloring, stirring to mix well.
-In the second bowl add several drops of black gel food coloring, stirring to mix well.
-In the third bowl keep this white.
-Spoon each color of icing into individual frosting bags with a #5 tips. Twist the open end of the bag to push the icing to the tip.
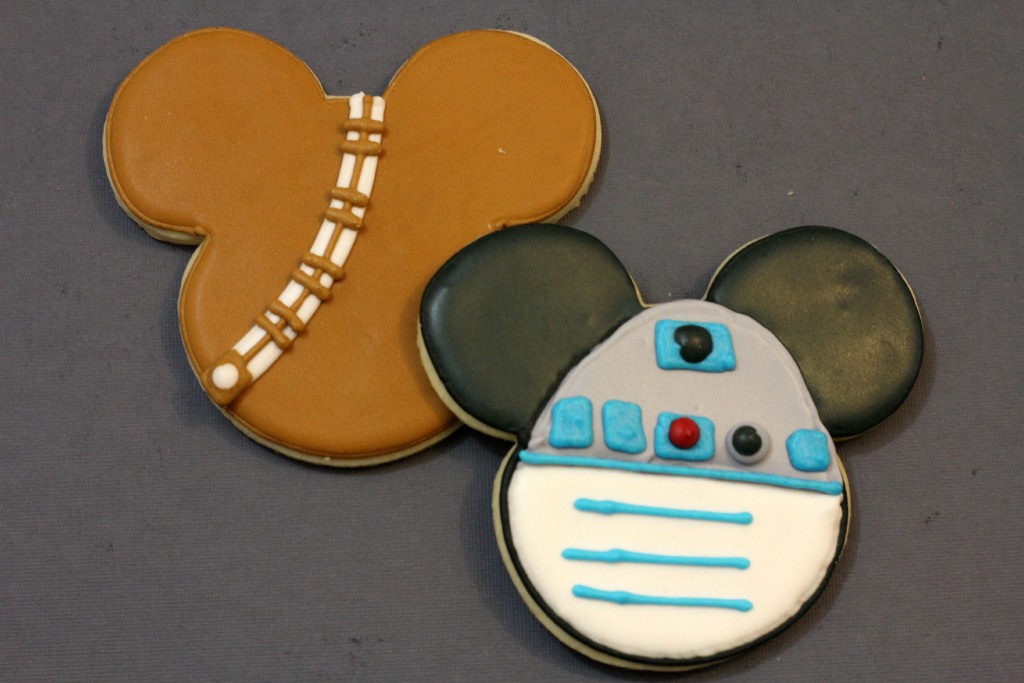
Mickey as Chewbacca
-Using the picture of the Mickey as Chewbacca as an outline.
-Outline each of the Mickey cookies in brown. Allow to dry for about 30 seconds. Fill in the cookies in with the brown thinner icing.* Allow to dry for about 30 seconds.
– *Squeeze the half of the brown icing into a bowl then add 1 tsp of water to this and mix it in.
-Leave the rest of the icing in the frosting bag for later use on the cookies.
-Further following Chewbacca’s picture as an outline, draw the shoulder belt in two separate lines in the white royal icing.
– Allow for the white belt to dry for 30 seconds.
-Add the brown belt loops to the white belt in the brown icing.
-Allow these cookies to dry from 5-10 hours
Mickey as R2D2
–Using the picture of the Mickey as R2D2 as an outline.
-Outline each of the R3D2 ears on the cookies in black. Allow to dry for about 30 seconds. Fill in the ears on the cookies with the black thinner icing.*
– *Squeeze the half of the black of the icing into a bowl then add 1 tsp of water to this and mix it in.
-Leave the rest of the icing in the frosting bag for later use on the cookies. Allow to dry for about 30 seconds.
-Follow the picture of R2D2as an outline.
-Outline the top half of R2D2 in grey icing. Allow several seconds for the outlining to dry.
– *Squeeze the half of the grey of the icing into a bowl then add 1 tsp of water to this and mix it in.
-Leave the rest of the icing in the frosting bag for later use on the cookies.
-Fill in the top half of R2D2 with the thinner grey icing.
-Outline the bottom half of R2D2 in white icing. Allow 30 seconds to dry.
– *Squeeze the half of the white of the icing into a bowl then add 1 tsp of water to this and mix it in.
-Leave the rest of the icing in the frosting bag for later use on the cookies,
-On the top half of the cookie near the top of the head add a small square in blue icing. Allow to dry for 30 seconds then add a small black dot.
-Just above the half way line between the grey and white halves add three small squares in blue icing. Allow 30 seconds for these to dry, One the third small blue square add a small red dot. Next to the small square with the red dot add a small grey dot. Allow it 30 seconds to dry before you add the smaller black dot. On the end of the head add a small square in the blue icing.
-Draw a line in the blue icing dividing the white bottom and grey top. In the white bottom half add three more lines in blue icing.
-Outline R2D2 the black icing.
-Allow these cookies to dry from 5-10 hours