This is a sponsored post on behalf of the Touch Coffee Brewer.
Recently I was given the chance to try Touch®, a coffee brewer with some awesome options that make this brewer stand out far above the rest.
According to the National Coffee Association USA, the brewing water temperature for a good cup of coffee is “between 195-205 degrees Fahrenheit for optimal extraction.” The Touch® T414S brewer can reach this ideal temperature by using its flash heating system and starts brewing in under 20 seconds after being off all night. Plus, Touch heats just enough water for the selected cup size as opposed to the entire tank of water, and the machine turns itself off after using, making it more energy efficient than its competitors.
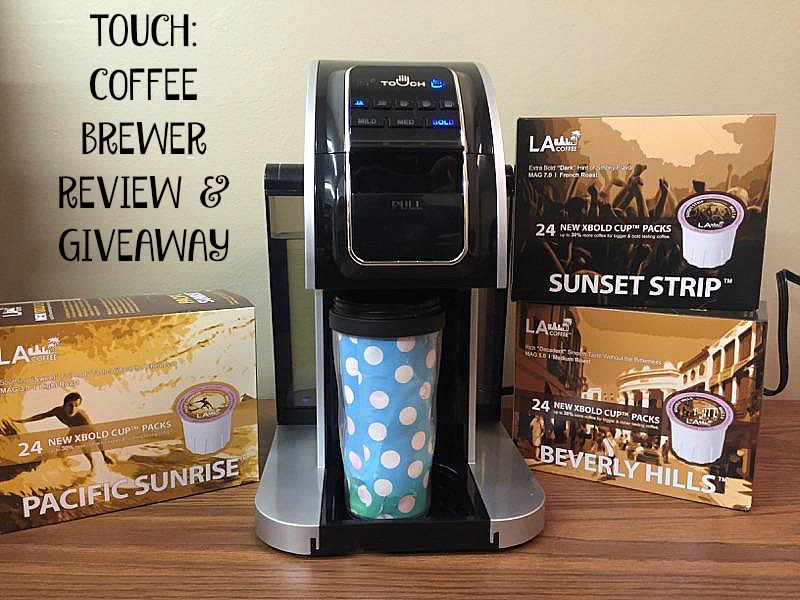
Touch has great coffee quality because the hot water has more contact with the coffee grounds, which ensures that the coffee flavor is extracted. It also brews larger cups of coffee without sacrificing flavor; you can customize your coffee cup size (6,8,10,12 and 14 oz) and threw brew strengths (mild, medium or bold).
The Touch brewer’s removable 90-ounce water tank has a greater capacity, refilling less often and always fresh. Al0ng with the LA Coffee, this brewer makes the perfect cup of coffee.
Compared to most K-Cups®, which only fit up to 12.5 grams of coffee, XBold Cups™ pack up to 15 grams of coffee and XLarge Cups™ provide up to 18 grams of coffee. Flavor Grooves swirl the coffee grinds to release bold aromas and flavors. The T414S is also compatible with the Touch Refill Jumbo Cup™, which packs up to 40 grams of your favorite coffee grounds—ideal for filling a carafe or large travel mug.
Touch is giving one lucky reader a chance to win their own Touch T414S Coffee Brewing machine AND L.A. coffee. Contest ends 11/22. Sorry, U.S. residents only.
*Disclaimer; Touch Coffee & Beverages, LLC is NOT affiliated with Keurig, Inc. or Green Mountain Coffee Roasters. Keurig® and KCup® are registered trademarks of Keurig, Inc.
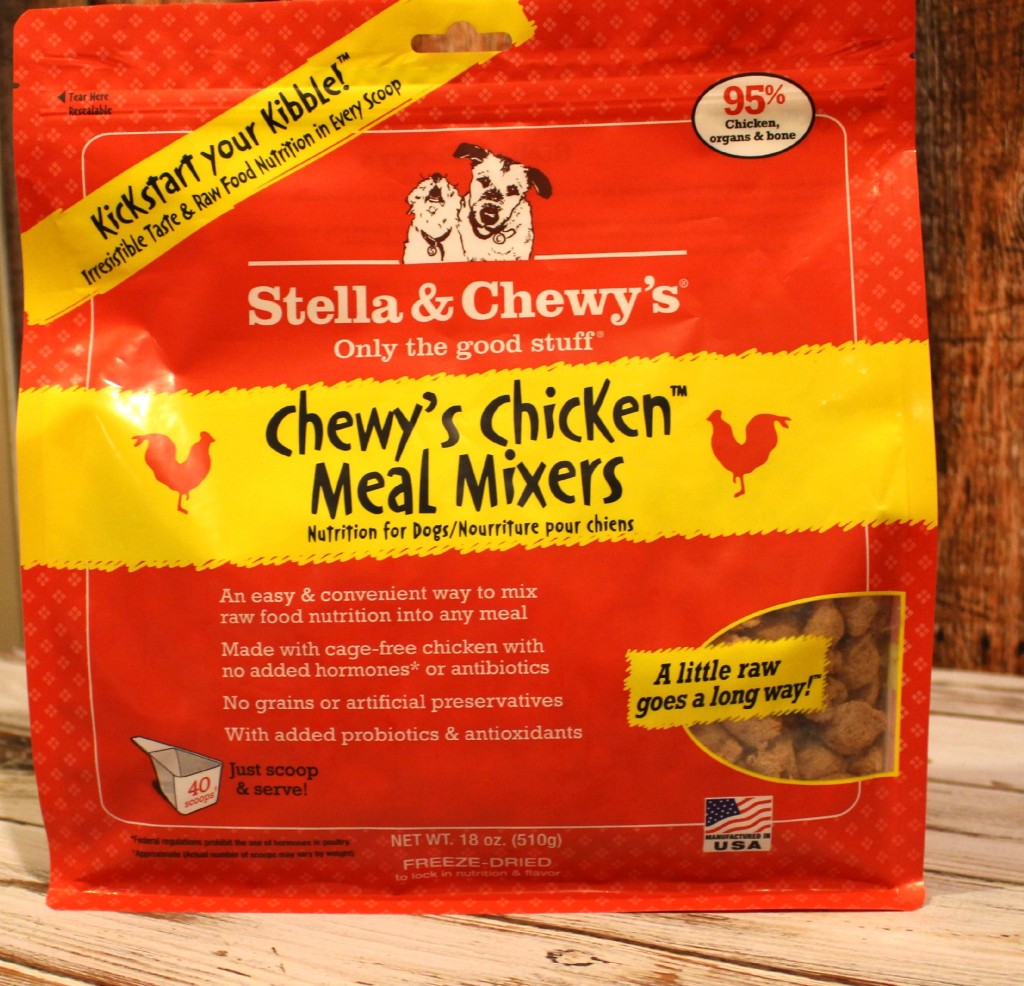
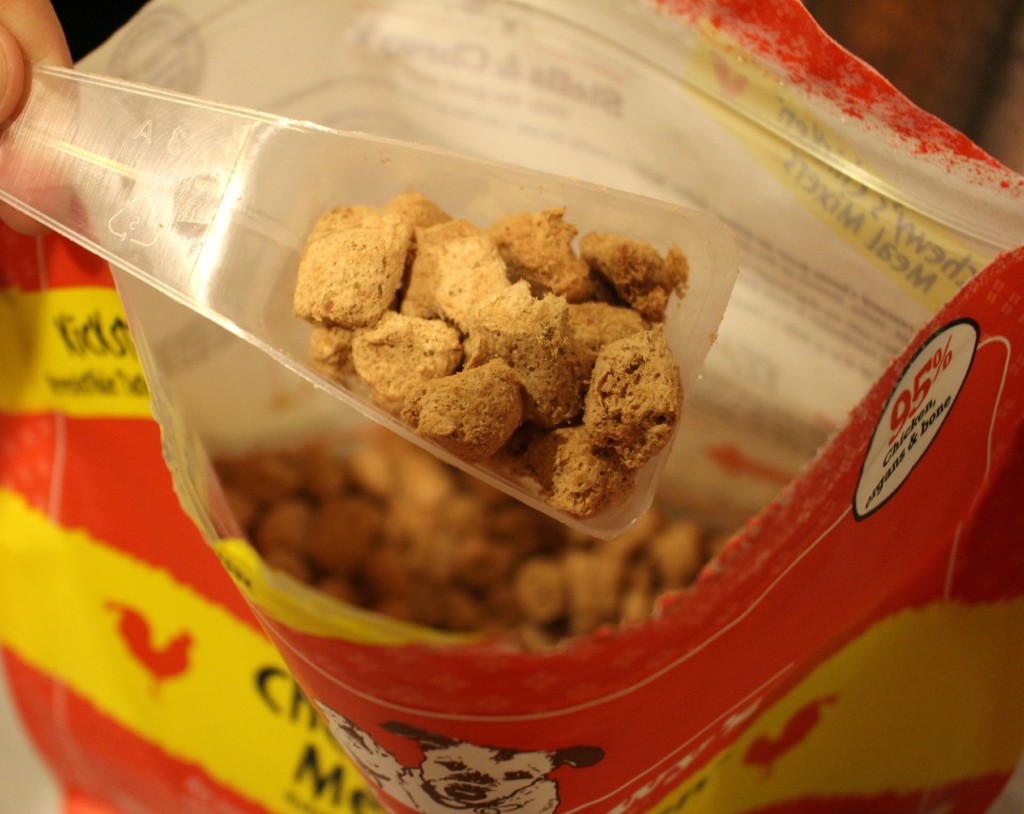
 Stella & Chewy’s Meal Mixers are freeze-dried to lock in the nutrition and flavor, and ready to add to your pet’s bowl right away! Every bag comes with it’s own scoop, and suggested serving size based on your dogs weight and size.


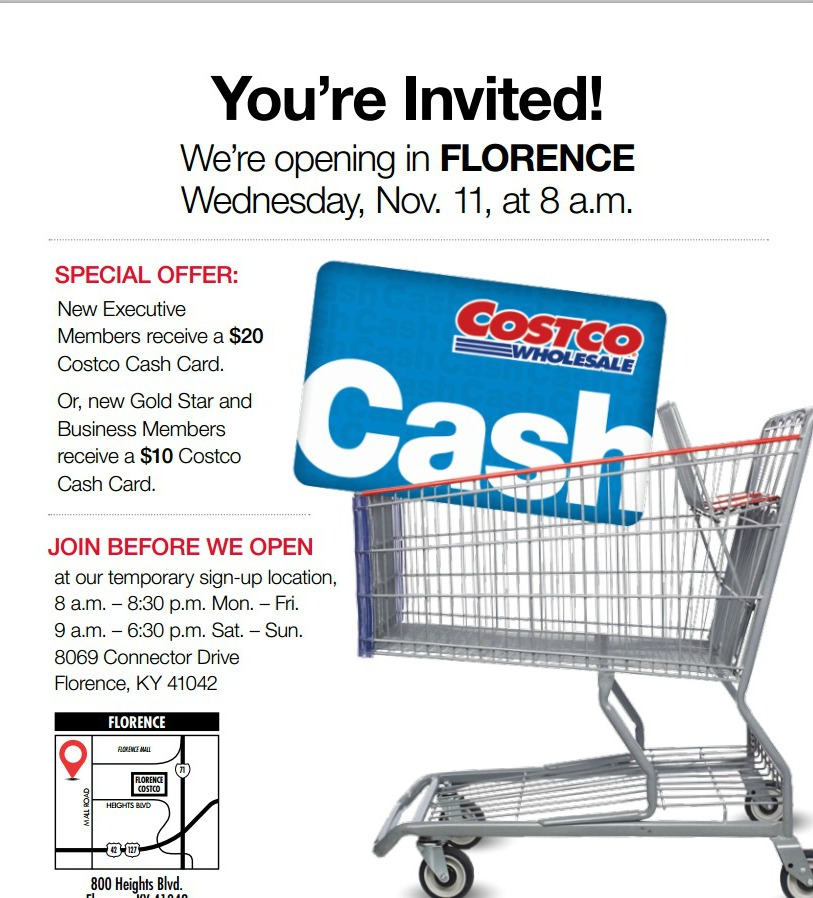
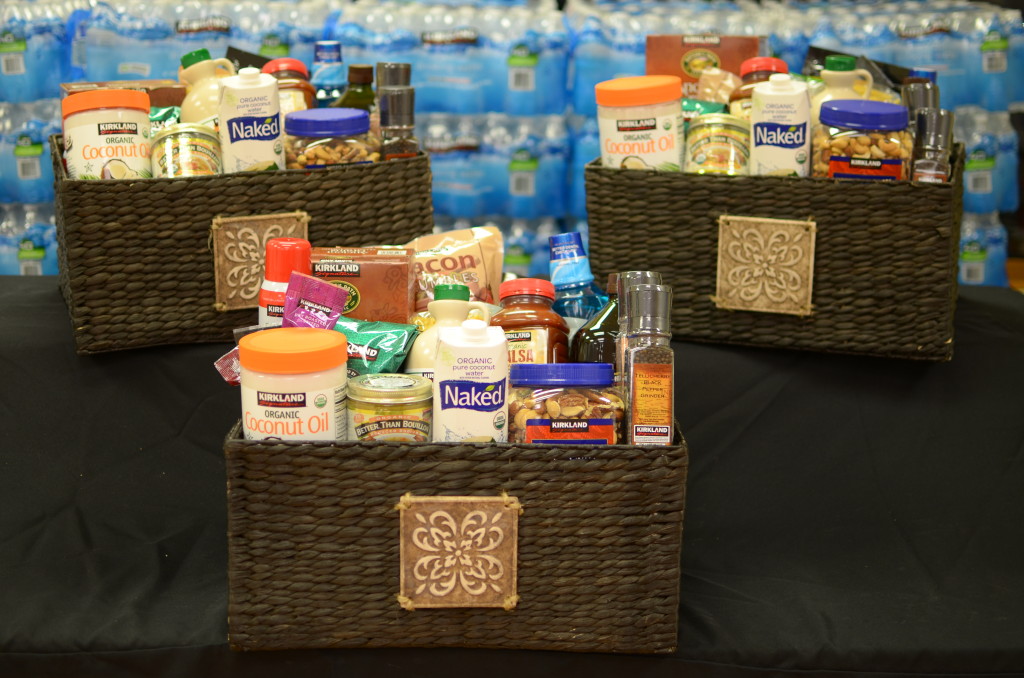
 Costco Florence is soo excited about their grand opening that they are offering 1 lucky All in a Days Work reader this awesome gift basket full of Costco Organic products worth over $200! All you need to do to enter is comment below – What is your favorite product to purchase at Costco?