
There is no doubt about it these days, one of our most valuable commodities is space. The biggest projects we take on to improve our home usually involve creating more space in some way. As our families grow in both number and size, the elbow room in the house reduces significantly. So what do we do about this problem. Well, for many the answer is simple; they just up sticks and move to a larger property. Sometimes, however, that is not possible or desirable.
What are the options if you love the village you are in, for example? Moving can be a wrench that will affect the lifestyle of you and your family. Often, if we want to find extra room for our family to expand into, it will come in the form of an extension. Now there are several choices that can be made here. Firstly there is a ground floor extension, if the land is available. Then there is a two story extension that will only take up as much land as the ground floor option, obviously. The third alternative to which many people are turning these days is a loft conversion. Land may be in short supply for an extension or maybe it is the lower cost of a loft conversion that people find attractive.
If a loft conversion has been entering your thoughts lately, but you are unsure whether to proceed with it yourself, read on. You will find here, a step by step guide to the process you can expect the project to follow in your home.
Access
The first consideration is easy and safe access to the loft. If it is to be converted into a habitable space, a ladder will not do. There will need to be a staircase installed that meets with building regulations. Since the stairs need to be a minimum specified width, the staircase is likely to take up a fair bit of room. Hopefully, your home is blessed with a very large landing or a walk-in cupboard somewhere that can be utilized. Considering the size of the loft, it may be worthwhile reducing the size of a bedroom to accommodate the stairs as it is likely that two bedrooms could be created above.
Floor
The beams in the loft may not be large enough to carry the weight of a floor above. There is no need to panic, however; this does not mean the ceilings will need to be replaced. Larger joists can often be installed alongside the existing ones, and it is these that will carry the weight. Before the floor surface is laid down, electricians and plumbers will be called in to fit the pipework and wiring for any lighting, power, or plumbing you intend to have installed.
Walls
When the floor is complete, the framework for internal walls is constructed. If the loft is huge, there may be room for two bedrooms and a bathroom. Wiring for light switches and power points will be fed through the frameworks to their final position.
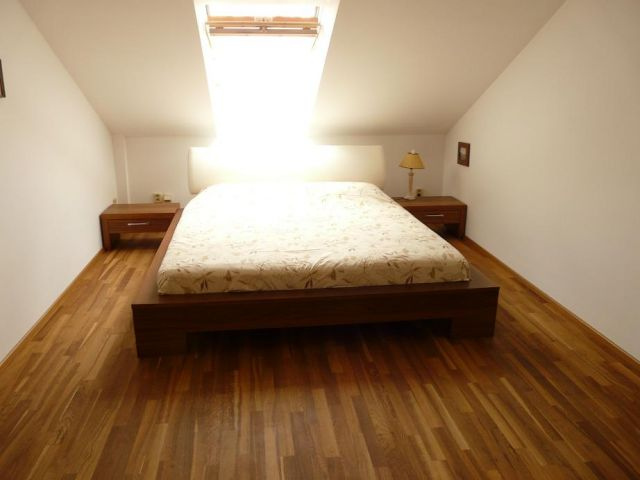
Light
The provision of adequate natural light will be an integral part of the plans. If there is a wall at one end of the loft, a standard window will be an option. The window will be fitted in exactly the same way as any other window in the house. Alternatively, fakro roof windows can be fitted into the sloping roof. These windows are designed especially for this purpose as standard frames are unsuitable. They are relatively simple to fit with basic carpentry skills and confidence when working at heights. A row of windows on either side of the roof will give plenty of light and would be a dream for an amateur astronomer.
Insulation
The roof itself will have to be insulated. There are different forms of insulation that could be used. Standard loft insulation that comes on a roll can be inserted between the roof joists, insulation can be blown into place with a special technique, or insulation panels can be cut with a hand saw and wedged into place.
Internal Boarding
Boarding all of the walls is an exciting stage in the build as it seems to happen so quickly. Plasterers don’t mess about once they get started. Armed with a utility knife, saw and a straight edge, they craft the plasterboard into the right shapes and nail or screw them to the beams. The joints are taped before the plaster topcoat is mixed. Watching the plasterers apply the topcoat is fascinating so try to make time to watch. They make a difficult job look simple. Hats off to the plasterers of this world. When they have finished their part in the construction, the end is in sight, and you can now appreciate how the finished project is going to look. Yes, it looks huge now but when the furniture is in, it will shrink.
Second Fix
The plumbers and electricians will now return to do their bit. The bathroom suite can be installed and connected, as can all of the power points and light fittings. The carpenters will also put in another appearance, to fit the skirting boards, architraves and doors.
Decorating
Now the job is almost complete, and you will be very anxious to move into the new space. Whether you are decorating yourself or calling in a contractor, you will have to decide on a scheme. The new plaster can be painted after it is dry which may be only twenty four hours after it is applied. If you have fitted a bathroom, don’t forget that it will need tiling too. All these jobs add up and take time.
Flooring
It is probably best to avoid laminate flooring upstairs and opt for a thick carpet to cut down on noise from walking around.
Well, now the job is complete, and though your nerves are shredded, you have increased the value of your home and gained a large, useful space, all in one project. Now the hard part comes; who is going to be gifted with the new surroundings? Will it be the children (probably) or your mother-in-law (no), or will you enjoy the loft yourself? I know what I would do.
